We love sailing — the joys of using natural differentials in air pressure paired with control lines to shape a piece of fabric and create movement is an altogether awesome way to explore the world. Sailing has been a primary form of transportation for thousands of years and for good reason. That being said, it’s largely dependent on somewhat predictable and often variable winds that sometimes just don’t feel like sticking around. When we’re underway, we prefer using our sails but when the wind decides to hang out elsewhere, we need the engine.
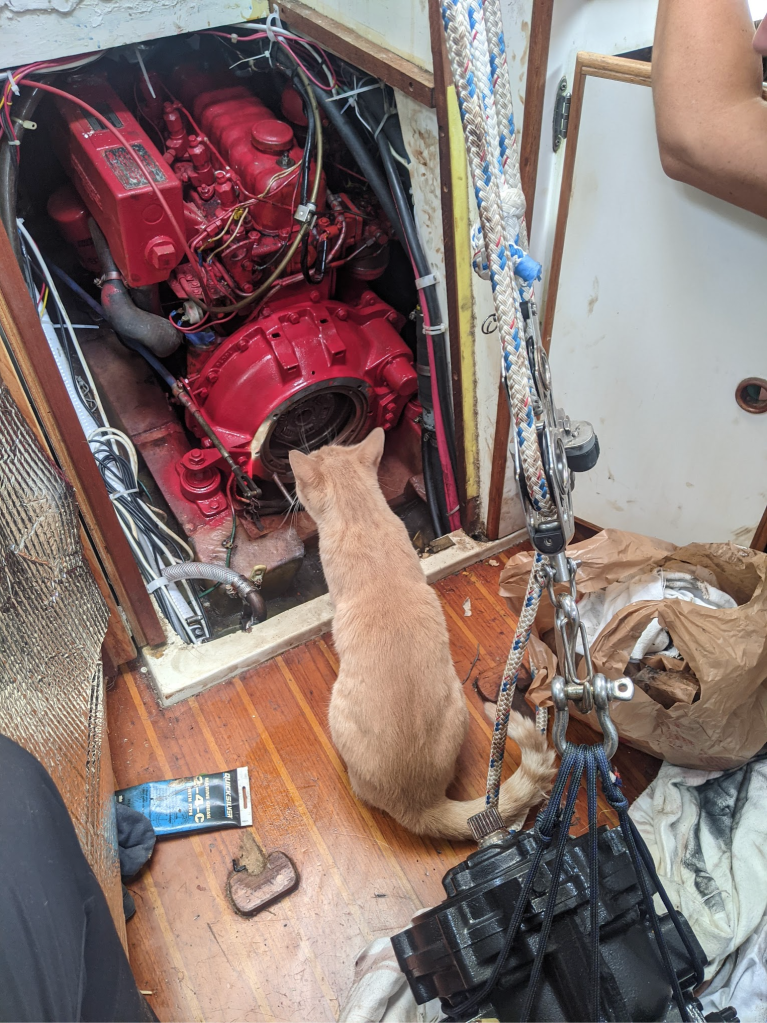
Azimuth was built with a 1979 Perkins 4-107 diesel engine, marinized by a company called Westerbeke and sold under the model name W40. It’s a four cylinder, 40hp, air-aspirated, water-cooled, direct drive system and it’s pretty much bulletproof. It’s as loud as a semi-truck, weighs over 650lbs, and is now over 42 years old. Aside from an injector issue a few years ago, it’s started up every time and been a champ throughout thousands of hours of motoring.
Ash and I have kept up with regular maintenance like changing the oil and filters, cleaning the fuel system, and keeping the fluid levels up. Diesels are relatively straightforward and we haven’t had many significant issues with ours. That being said, 42+ years is getting up there in age, and some of the original components, through regular use, are getting worn to the point of needing replacement. A big one for us recently was the rear main seal.
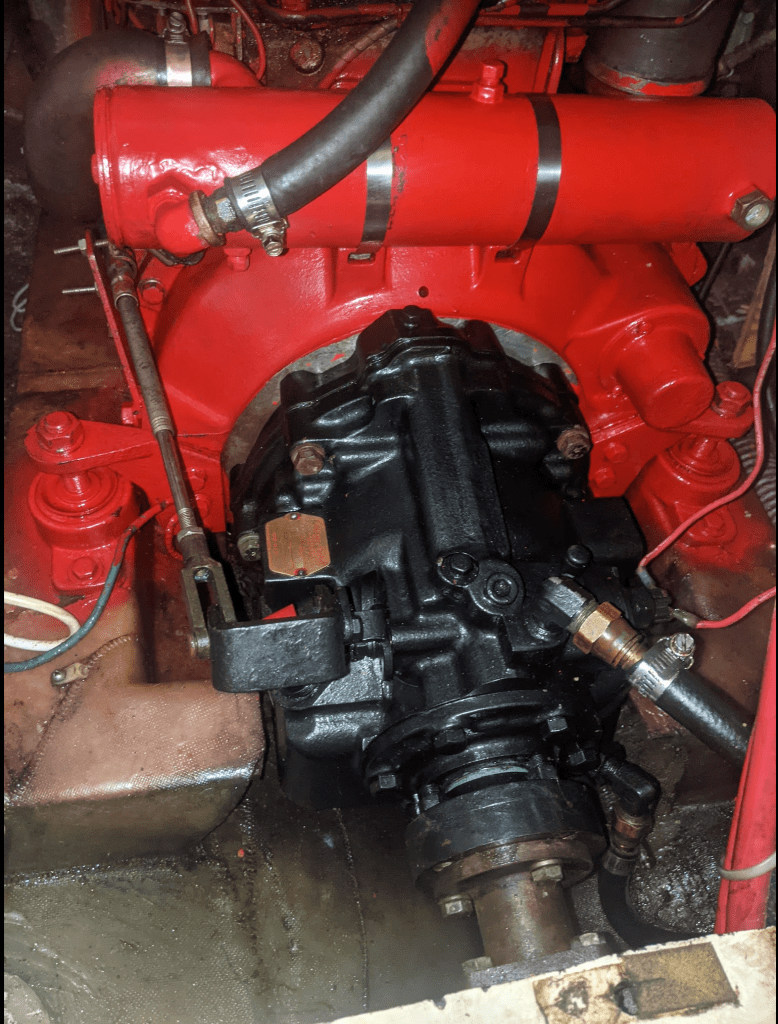
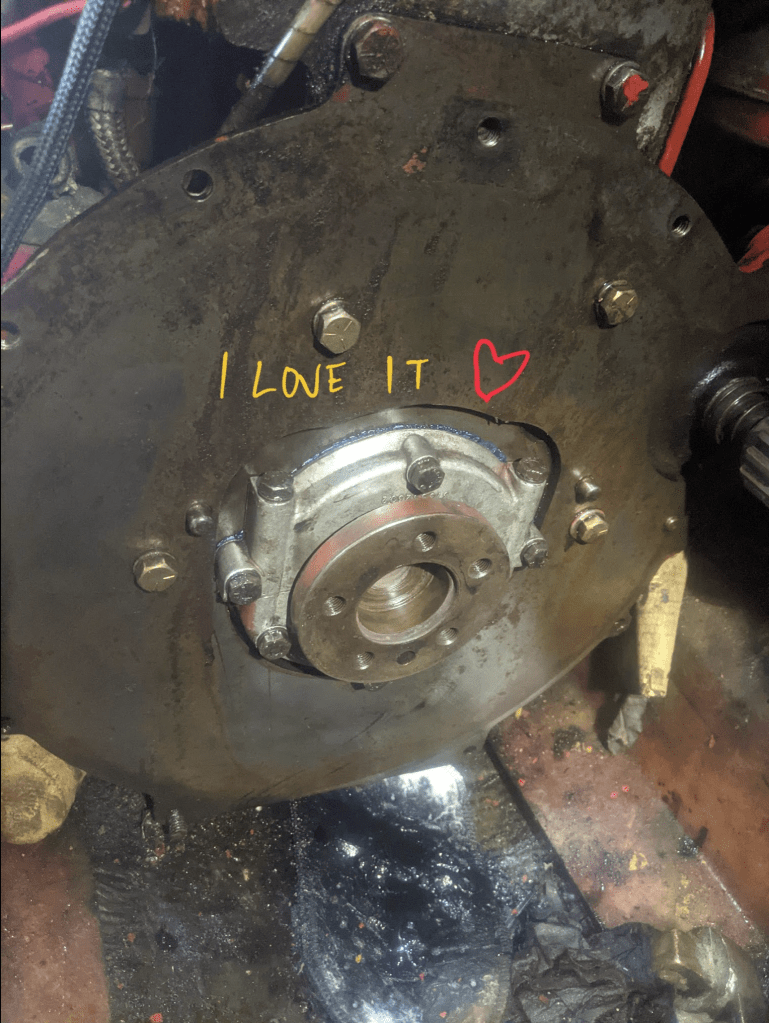
The rear main seal circles the output shaft and keeps oil in the engine while the shaft is turning. When it began to wear out, we noticed we were going through oil a lot faster than usual, and that we were noticing a lot more oil in the bilge than we should. There are a multitude of problems with these symptoms, primarily oil being pumped overboard (not good!), risking a low oil situation (potentially catastrophic for the engine), and not being able to purchase enough oil down the coast of Mexico and Central America to keep the reservoir full. In my research I learned that this was a “known issue” for these engines and that there were ample YouTube videos and material online to learn and understand both the problem and the solution.
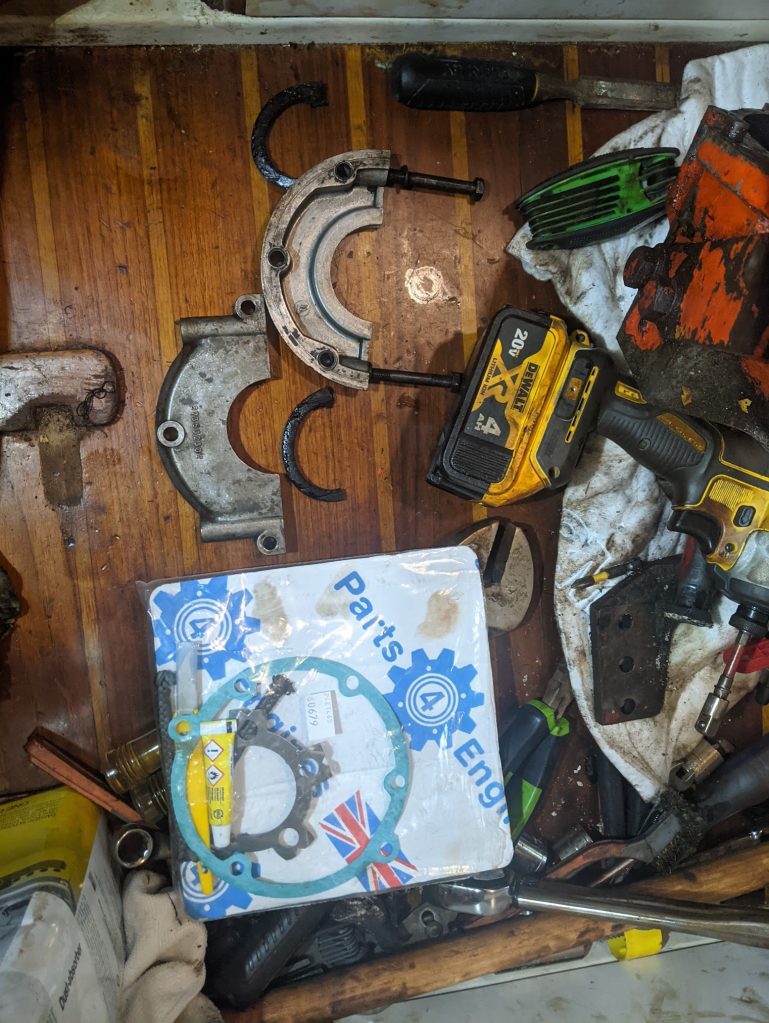
Knowing that this would be a multi-day, extremely messy, and potentially difficult repair, I aligned the project with a week that Ashley was on a work trip to Oregon. It’s not that more hands aren’t helpful but rather that our engine access is extremely limited and that there would really only be enough space for one person to work on it at a time. I purchased a very handy rear seal replacement kit from Parts4Engines.com (highly recommend their products for quality, great customer service, and surprisingly fast shipping times all the way from Sheffield).
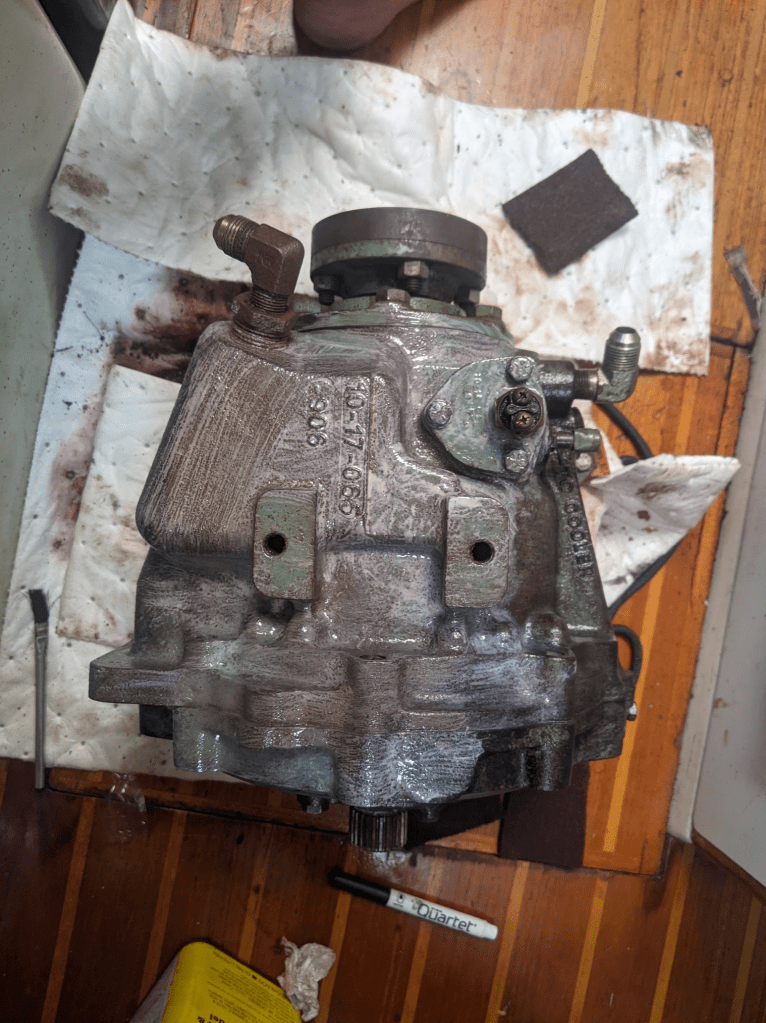
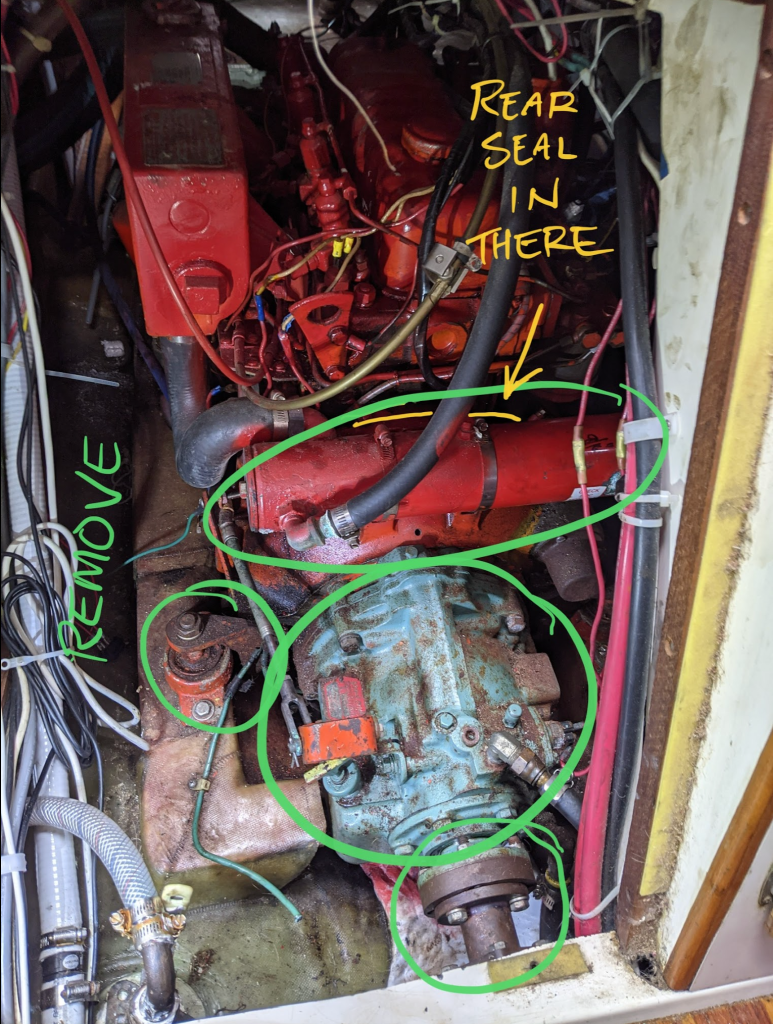
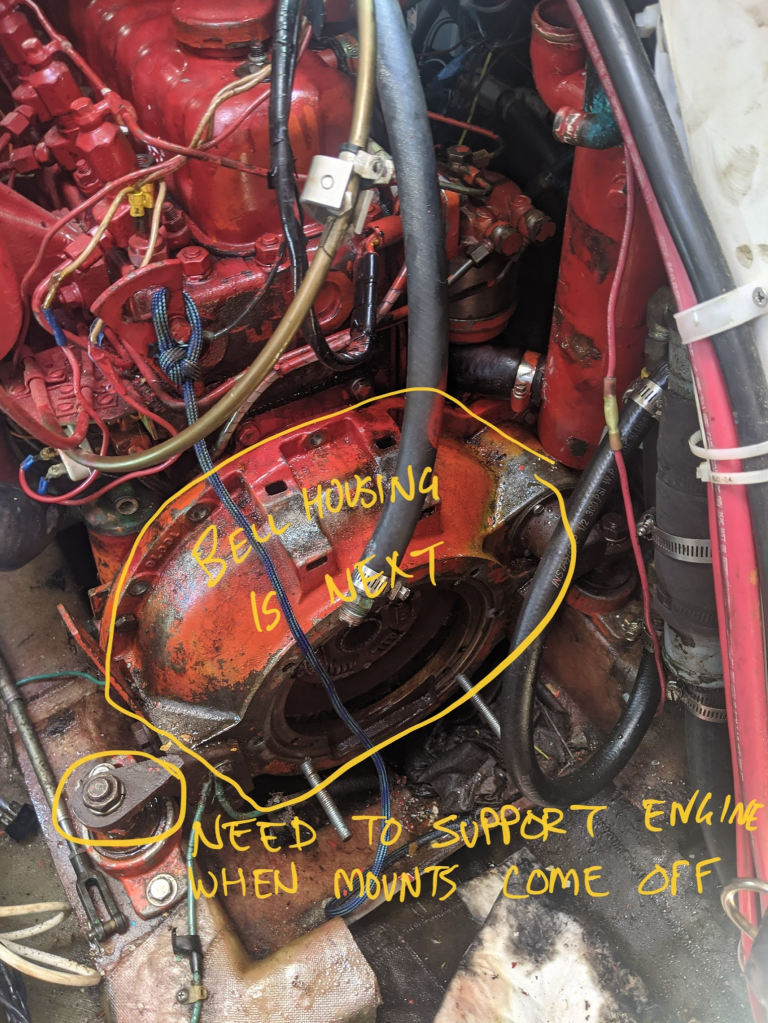
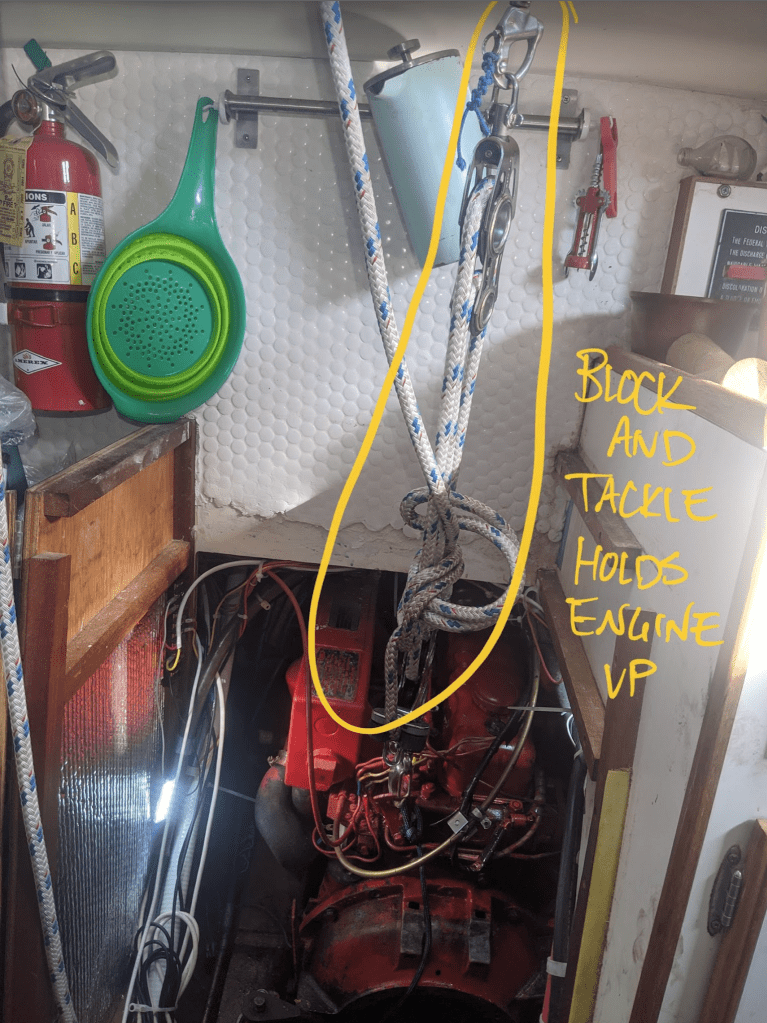
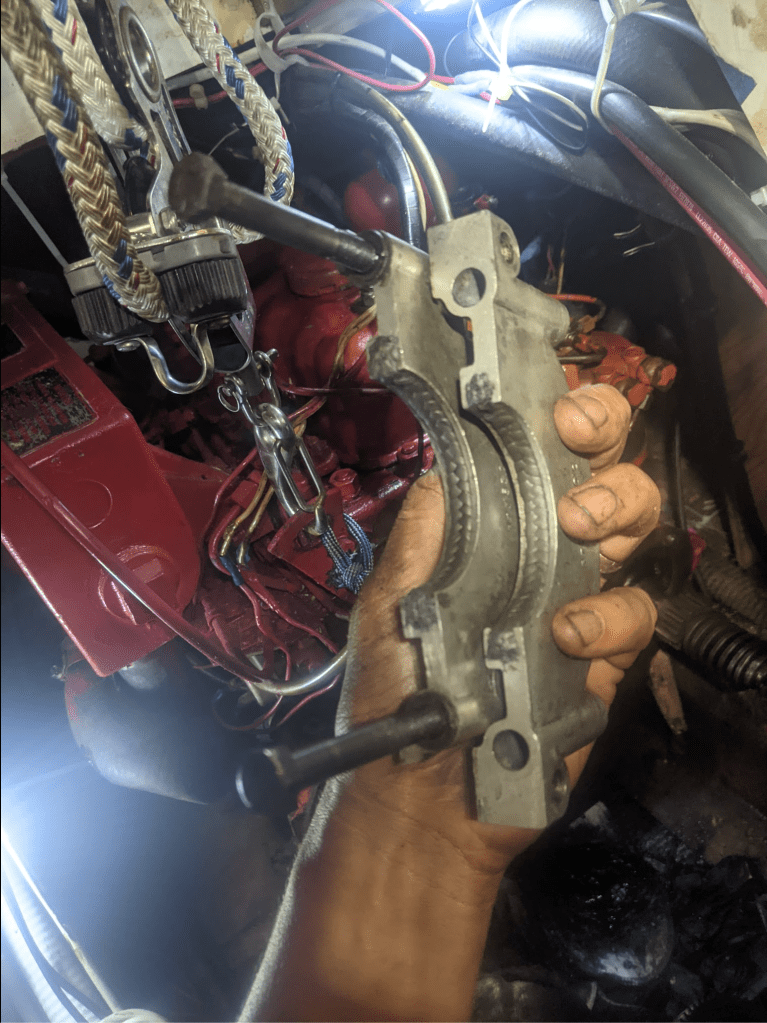
The first half of the project was taking things apart and off. The rear main seal is behind the heat exchanger, bell housing, flywheel, and compression plate and in order to reach and remove those I first needed to disconnect and clear away the shaft between the engine and the v-drive, the coupling, and the transmission. The latter requiring a block and tackle lift because of its weight.

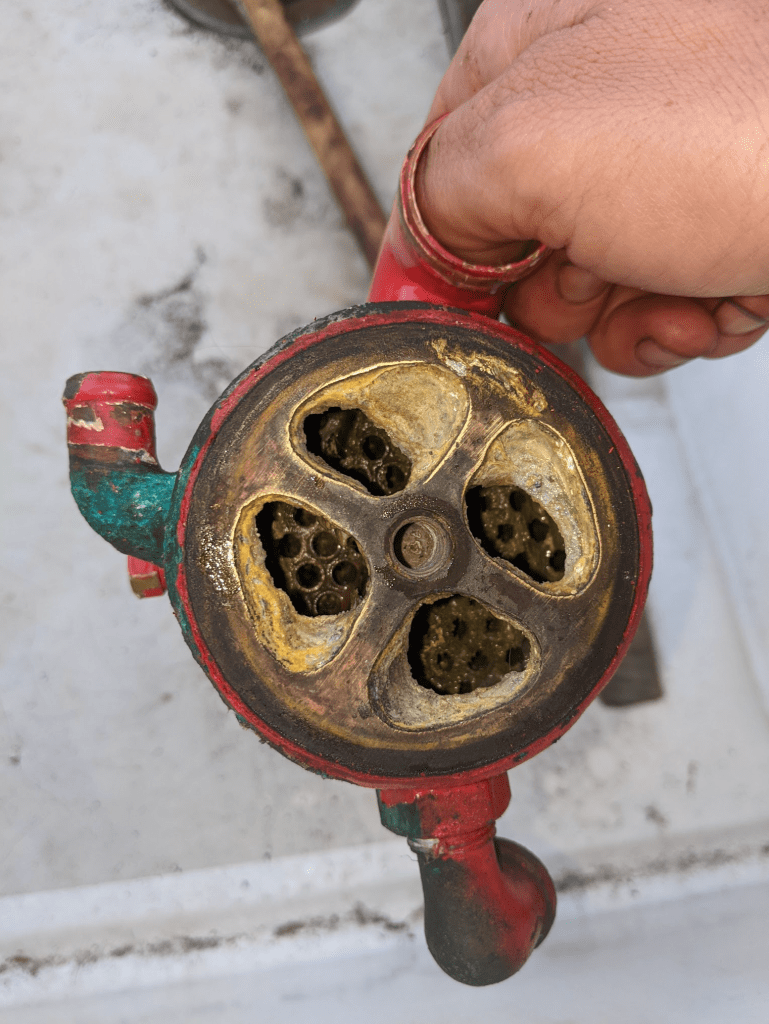
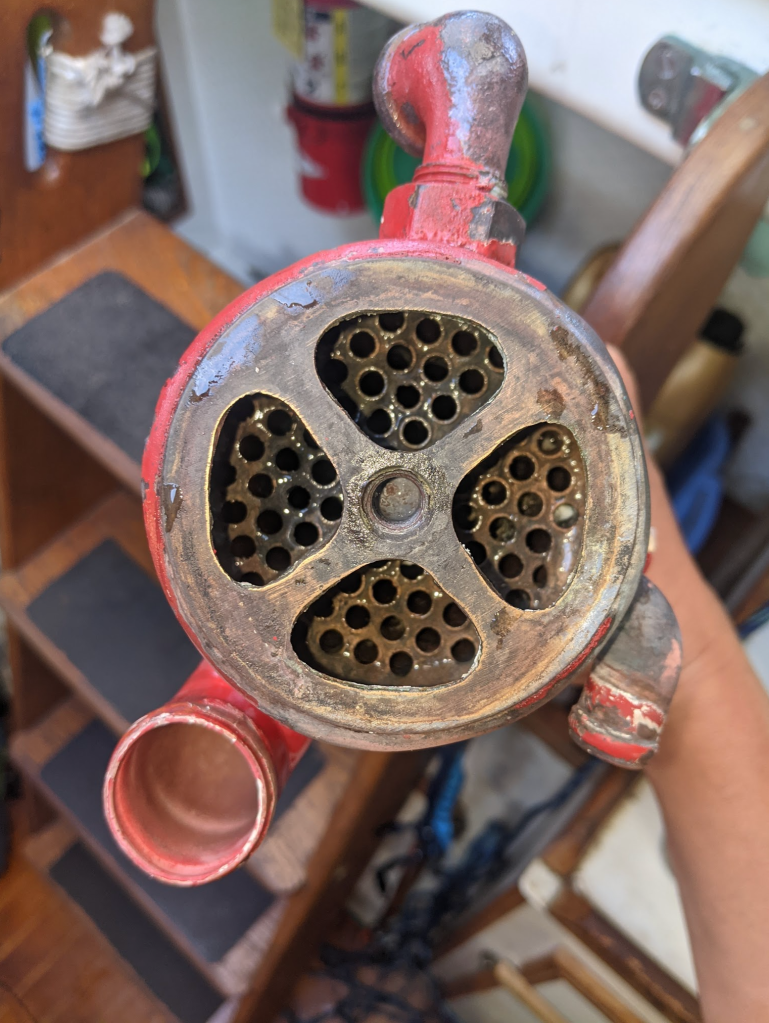
Nearly everything here was covered in surface rust and the kind of grime you get with a 40+ year old engine in a marine environment. Additionally, in disconnecting the transmission, water cooling, and oil cooling lines I was subsequently covered in transmission fluid, coolant, and motor oil at all times throughout the four days of the project. I did a little research on surface rust and found a Loctite rust remediator product I really liked and bought some for when I put everything back together.
Realizing that the bell housing was connected to two of the engine mounts, I hooked up the block and tackle to a halyard outside, redirected through the cockpit and into the boat using a not-fancy-but-very-practical maze of blocks and redirecting lines. I used that system to secure the engine from vertical movement while I removed the two mounts closest to me. I was pleasantly surprised that aside from difficult access, the bolts I needed to remove were relatively easy to work on. I only ran into trouble near the end with the compression plate bolts. I used a 3 foot piece of wooden dowel attached to a breaker bar and finally to the socket wrench to free them. Pictures speak a thousand words so here’s some photo coverage.


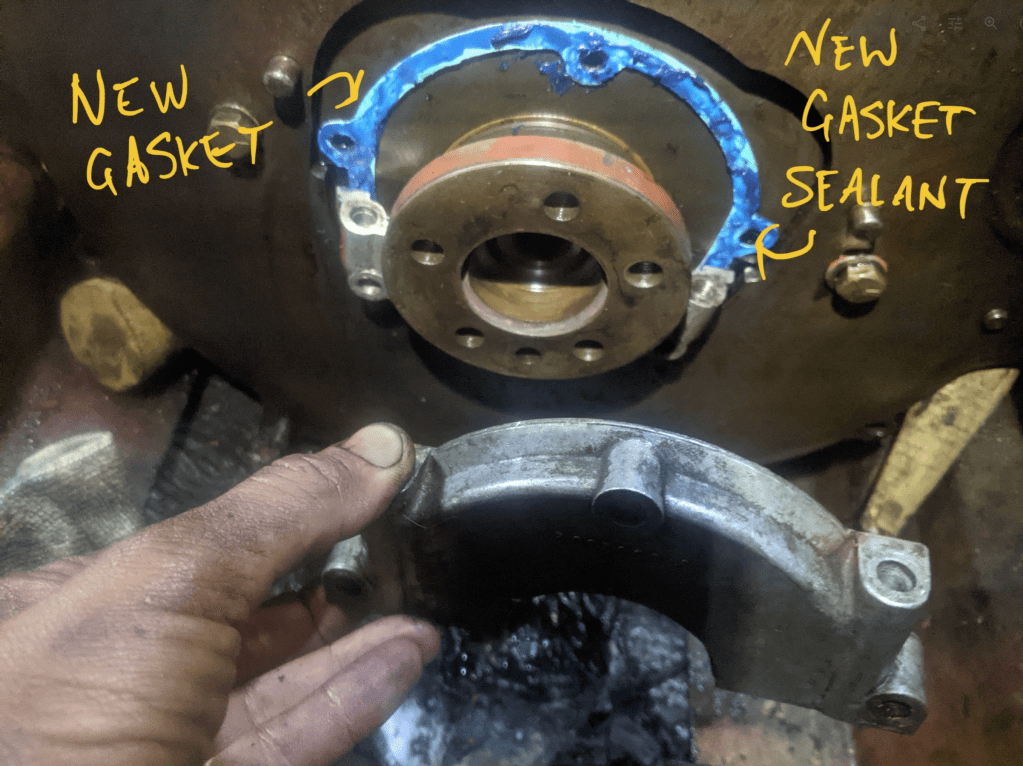
Then I reached it, the rear main seal! It was obvious that there was very little “sealing” happening by the amount of oil leaking out around the housing. I followed the instructions on the Parts4Engines kit and got the new fancy graphite seal in, cleaned everything up, and started preparing to put things back together. It was around midnight at this point and though sleep was calling, I wanted to at least get the engine mounts back on because the thought of leaving the engine hanging, on anchor, overnight was not one I wanted to think about too much.

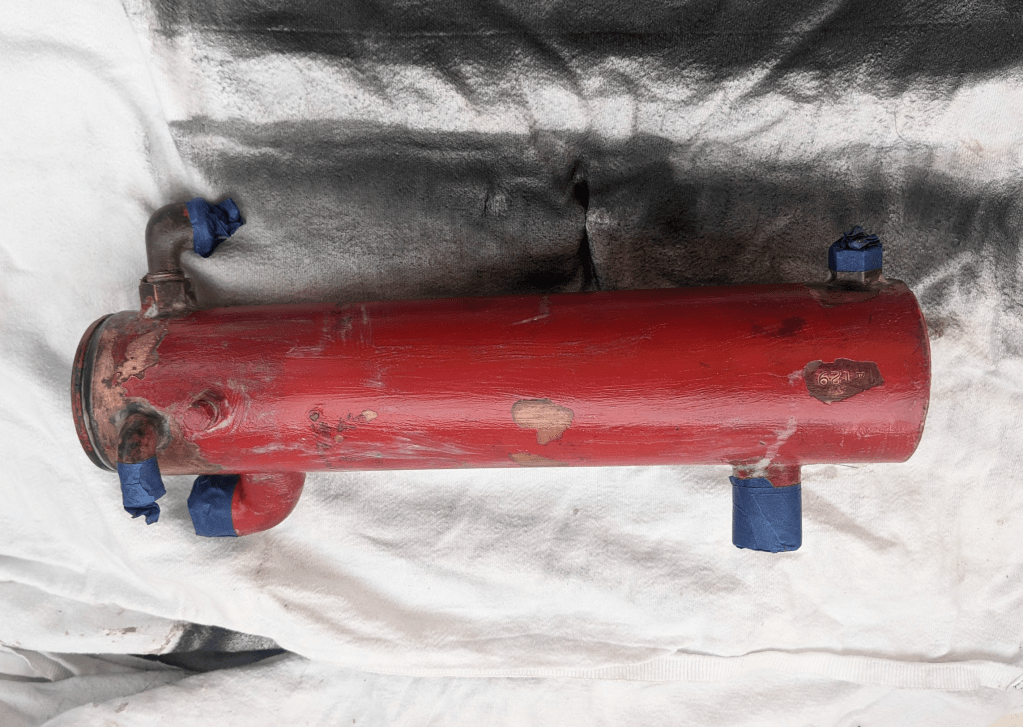
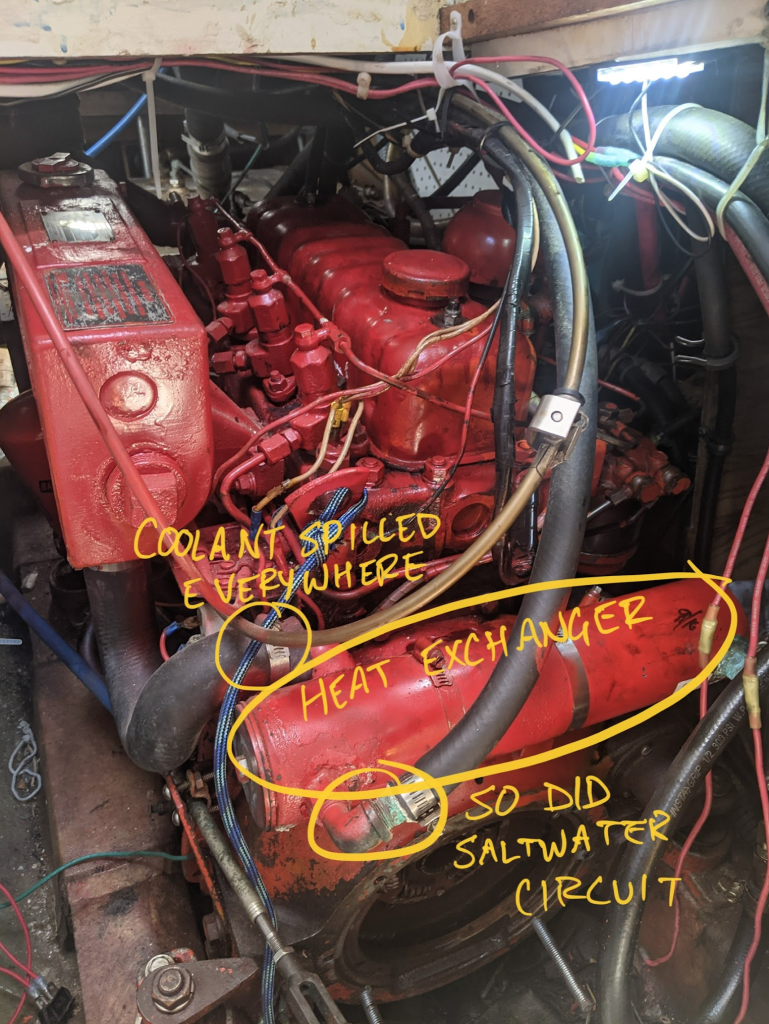
Putting the systems back together was relatively straightforward and I decided to try and clean things up as I went. While I had the heat exchanger and oil cooler out, I wanted to clean them up inside and out. I purchased a marine descaler and soaked both units for a couple hours to noticeable success.


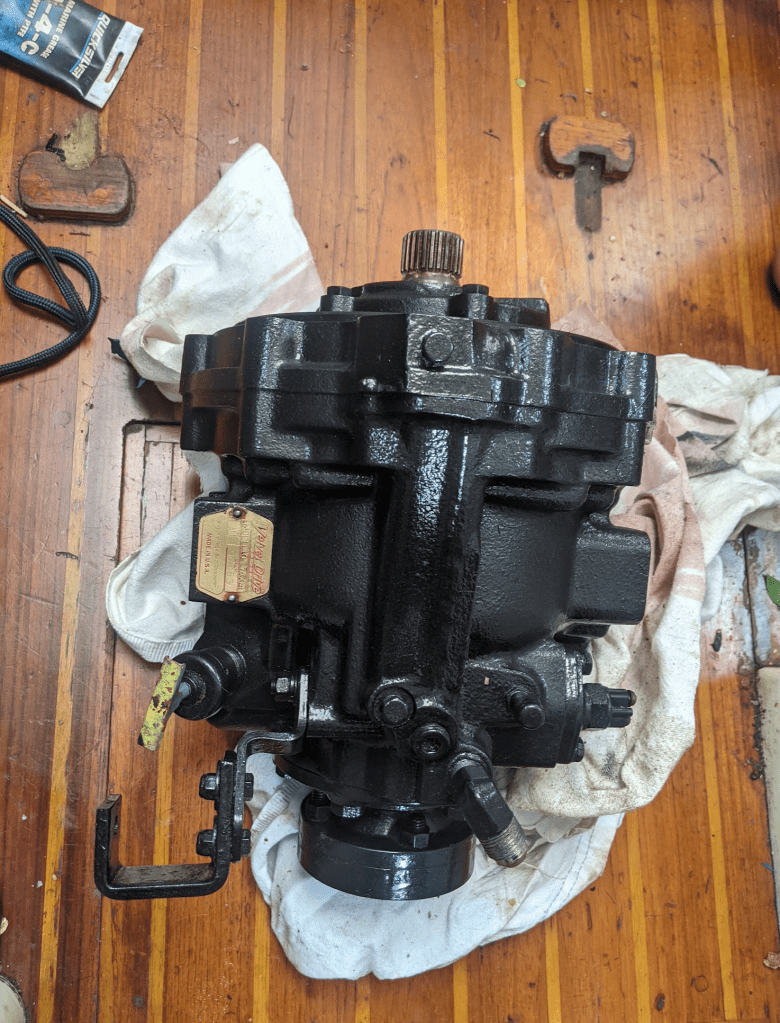
Separately, I used the Loctite rust remediator and Scotch Brite pads to prep the the engine bits for a new coat of enamel paint. Fast forward a day and everything was looking really good. Ash returned from her trip to help me put the transmission and final bits back together and there we go, left it better than we found it!