Good morning! How is it Thursday already?
Ash and I have been house-sitting lately and recently returned to the boat. It’s so comfortable here we both just sank back into the boat, being 100% familiar with your surroundings is such a cozy feeling. It’s such a bonus that we are able to take this little cozy boat to faraway places and still hold on to that familiarity of home.
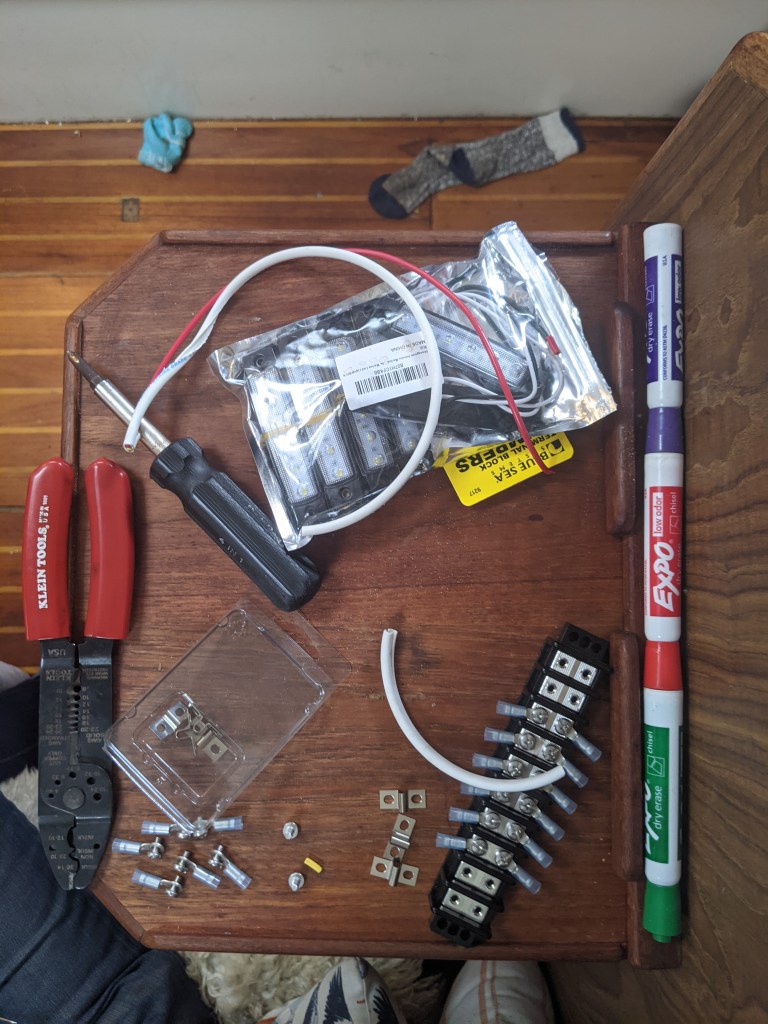
We’ve been tackling “little projects” here and there in our free time. Most recently this included adding small LED lights to the engine compartment in an effort to make it a little less scary in there. The space is so tight in places that sometimes even a headlamp makes it difficult to reach into spaces to access different parts of the system. I had a left over bus bar from a different project and mounted it in an accessible yet out-of-the-way area in the compartment. Ash got into the starboard lazarette to wire the bus into a fusebox I installed earlier this year to help organize the functional-yet-antiqued DC bus system the boat came with. Every time we have to do this it pushes me closer to wanted to re-wire the entire thing, but that’s not a scale of project creep I can take on right now! Plus it works… I mounted a few of these LED lights I bought around the engine compartment and wired them into the bus. Next I added a small rocker switch, also extra from a previous project, and intend to mount it in an accessible part of the compartment, near the access door in the galley. The lights work! The switch works! The wires are sized and crimped properly! I feel like that’s an “adult” step and I’m proud of it.
A lot of sailing and preparing for sailing is making sure that the easiest choice is also the best and safest choice. Earlier this year when Ash and I redesigned and rebuilt the main DC electrical system, we broke down our wiring needs into four “levels” and purchased wire, terminals, and hardware to support those four levels. We use 2/0 cable for the highest power needs, 4ga for the next, 10ga, and then finally 16ga for everything else. This is way conservative according to most guides, but it drastically reduces voltage drop in most applications and reduces wire heat and the probability we’ll have issues down the road. Plus there’s the bonus of only having to buy connectors and heat shrink for these four sizes. All this to say, I had plenty of 16ga wire and terminals for this project, and it was comforting to know it was already sized properly.