Azimuth came to us with a Simpson Lawrence windlass that was older than me. It worked, but not without some awful creaking, chain complications, and always the fear that I’d stub my toe on it before getting any decent use from it. It was a manual windlass, meaning that either Ash or I (or whomever aboard we roped into doing it for us) had to exert a good amount of effort using this “lever” (essentially a two foot piece of flat hardened steel) to work back and forth, engaging gears that would pull the chain in foot by foot. It was leagues better than weighing anchor by hand, but just about as muddy… and admittedly not that much better.
I’ve heard from several friends that we should avoid a situation where exhaustion prevents us from moving the boat to a safer anchor. I can imagine that after two or more tries — letting out 100′ of chain just to pull it back up again — we’d be exhausted and not looking to do it again. A lot of what I’ve learned about boating over time is reducing the effort it takes to make safety and essential efforts with the boat. As we tire it gets harder to make smart decisions and if the boat it laid out in a way where the easy decisions are also the smart ones, we’ll be in a better place.
We had the opportunity to purchase a nice Lewmar windlass from a friend that runs of 12v with a 1000w motor, plenty to pick up our 150′ of chain and 45# Rocna. The installation process (in progress) has presented a number of complications, but I feel I’m learning something new nearly every step of the way.
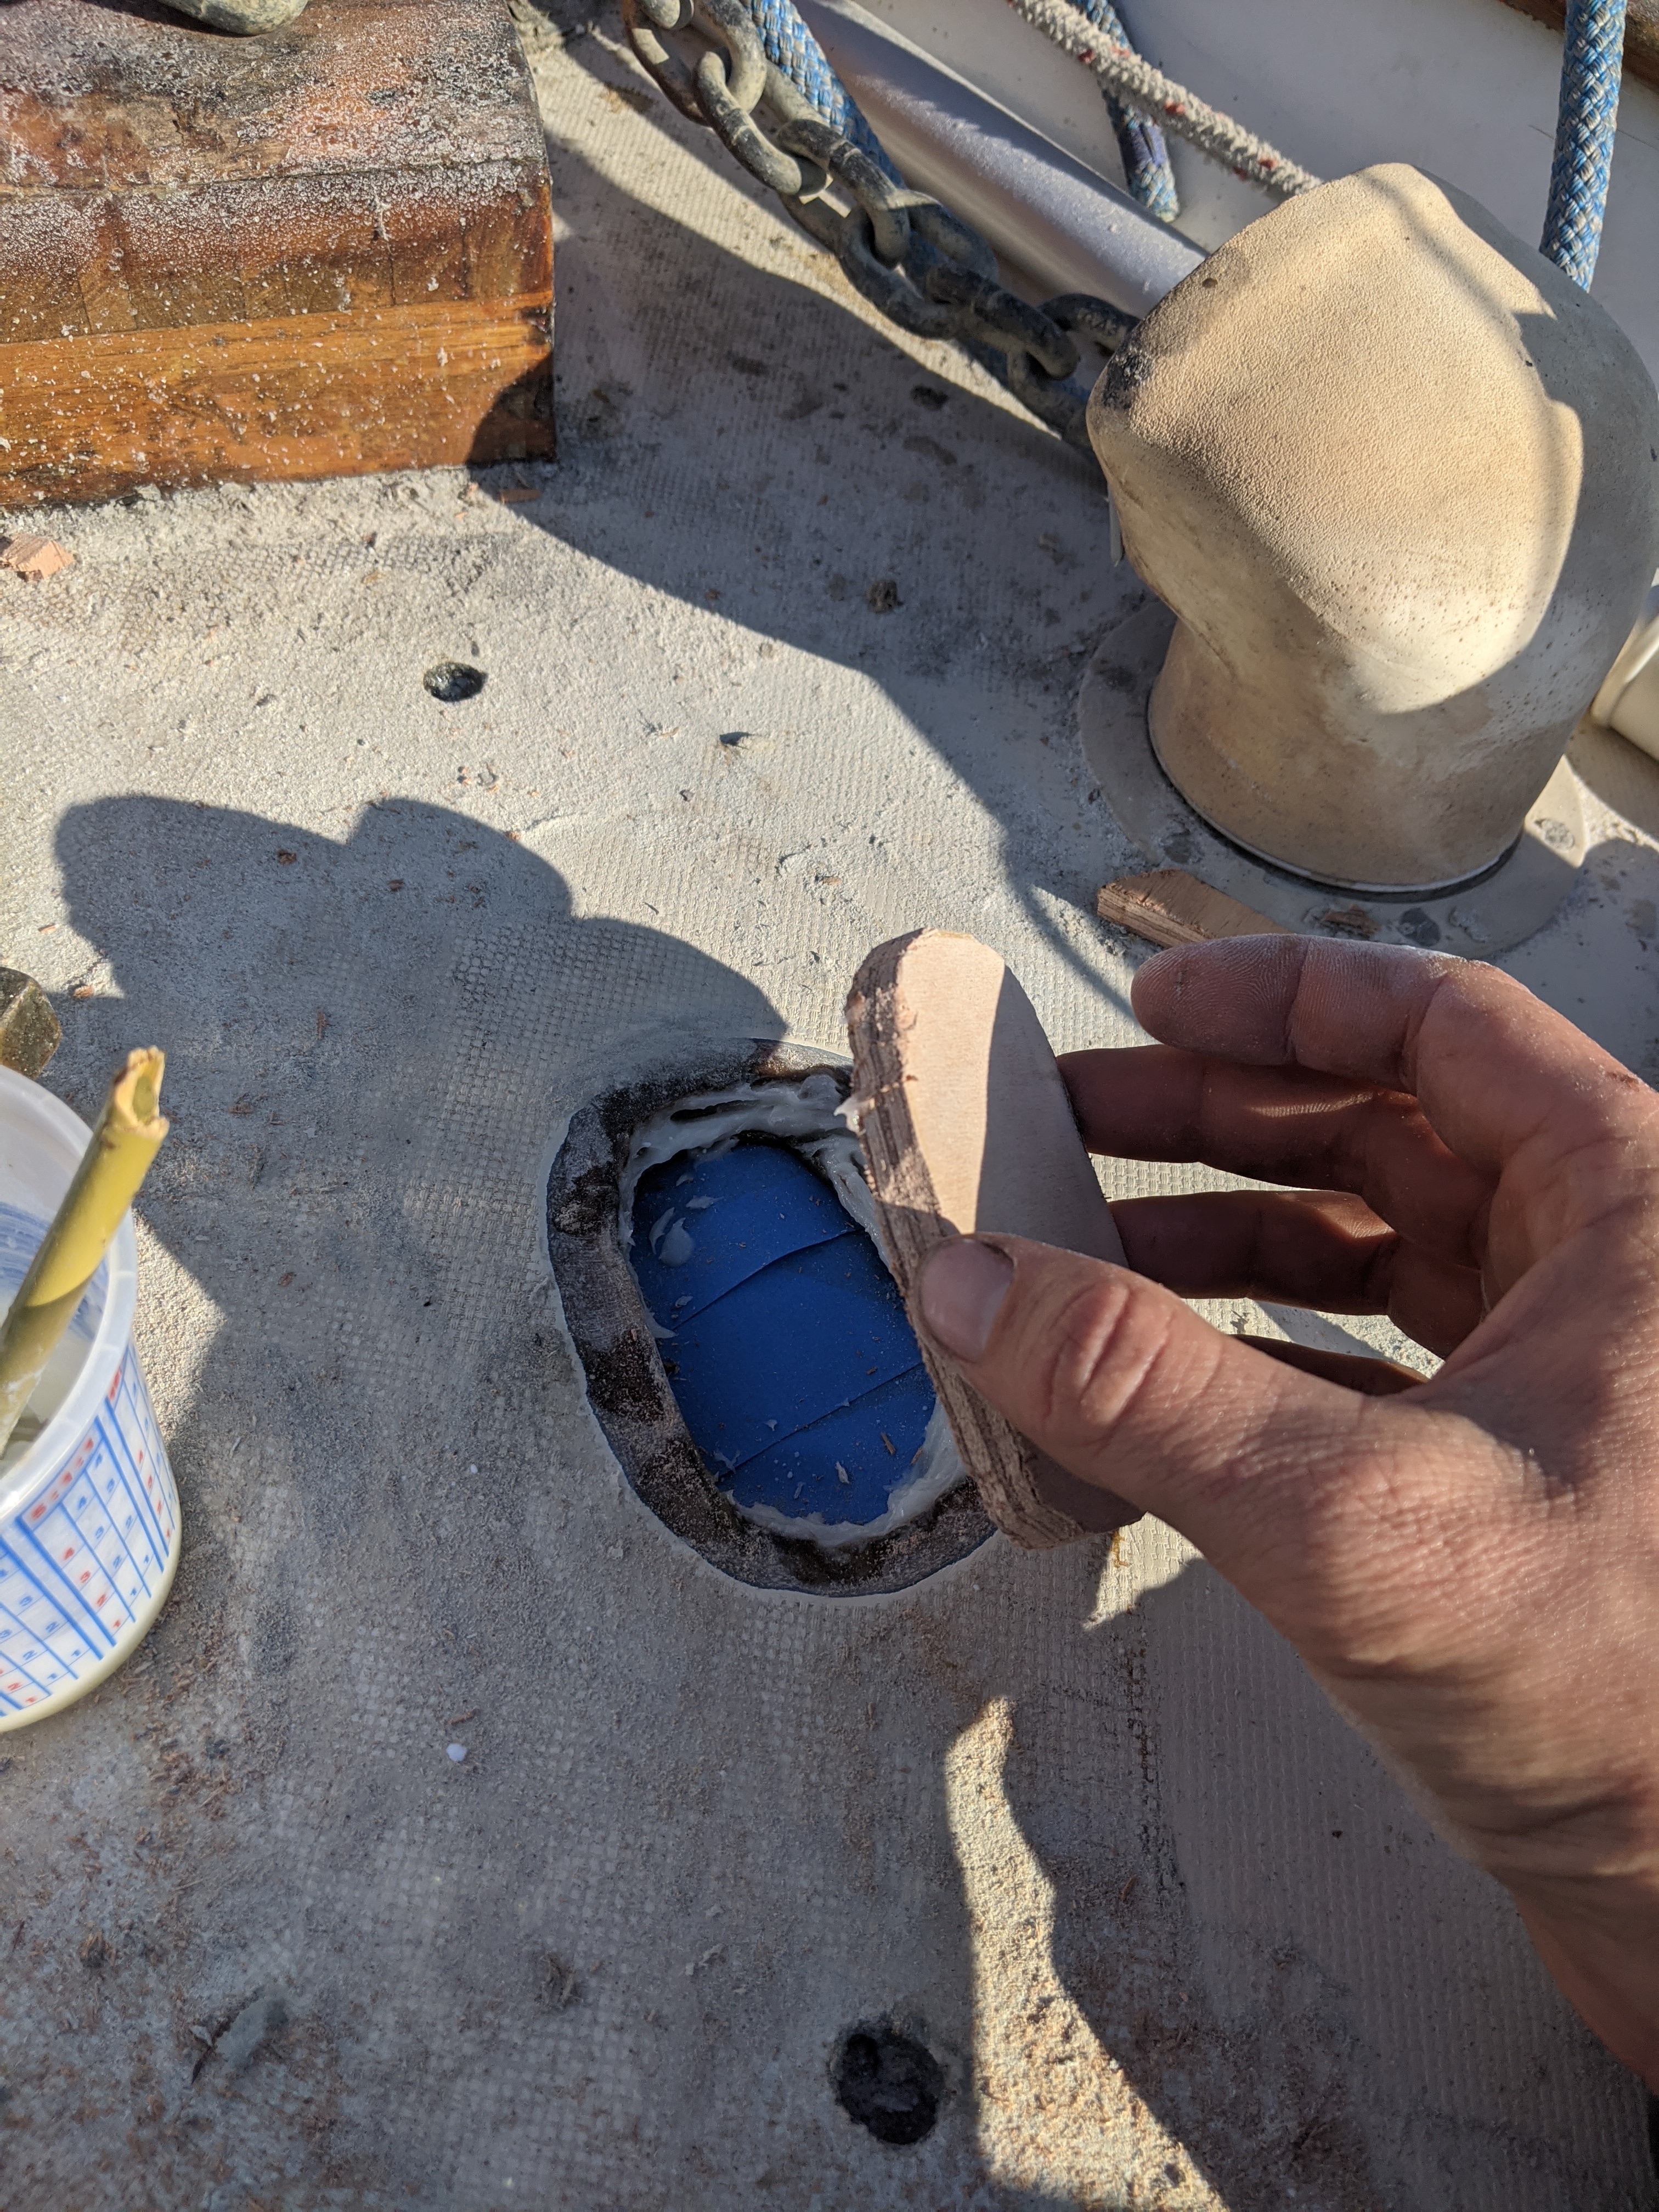
The first step was to properly fill and repair the hole from the previous windlass. Well actually, the real first step was to remove the old windlass, which consisted of removing the nuts from under the deck, peeling away the old sealant, and hulking it off (no pictures of this sorry). The chain-fall hole of the old windlass doesn’t line up with where we’ll need the new one to be so I had to fill and strengthen the old hole as it will now essentially be part of the deck structure. I heard from an old boatyard friend that hole bigger than a quarter in a cored fiberglass structure should be replaced with a core material, like the area around it. One can usually use thickened epoxy for filling most small holes, but the hardness of cured epoxy placed in a big enough hole of a flexible fiberglass deck can work the epoxy plug out over time while the rest of the deck flexes around it.

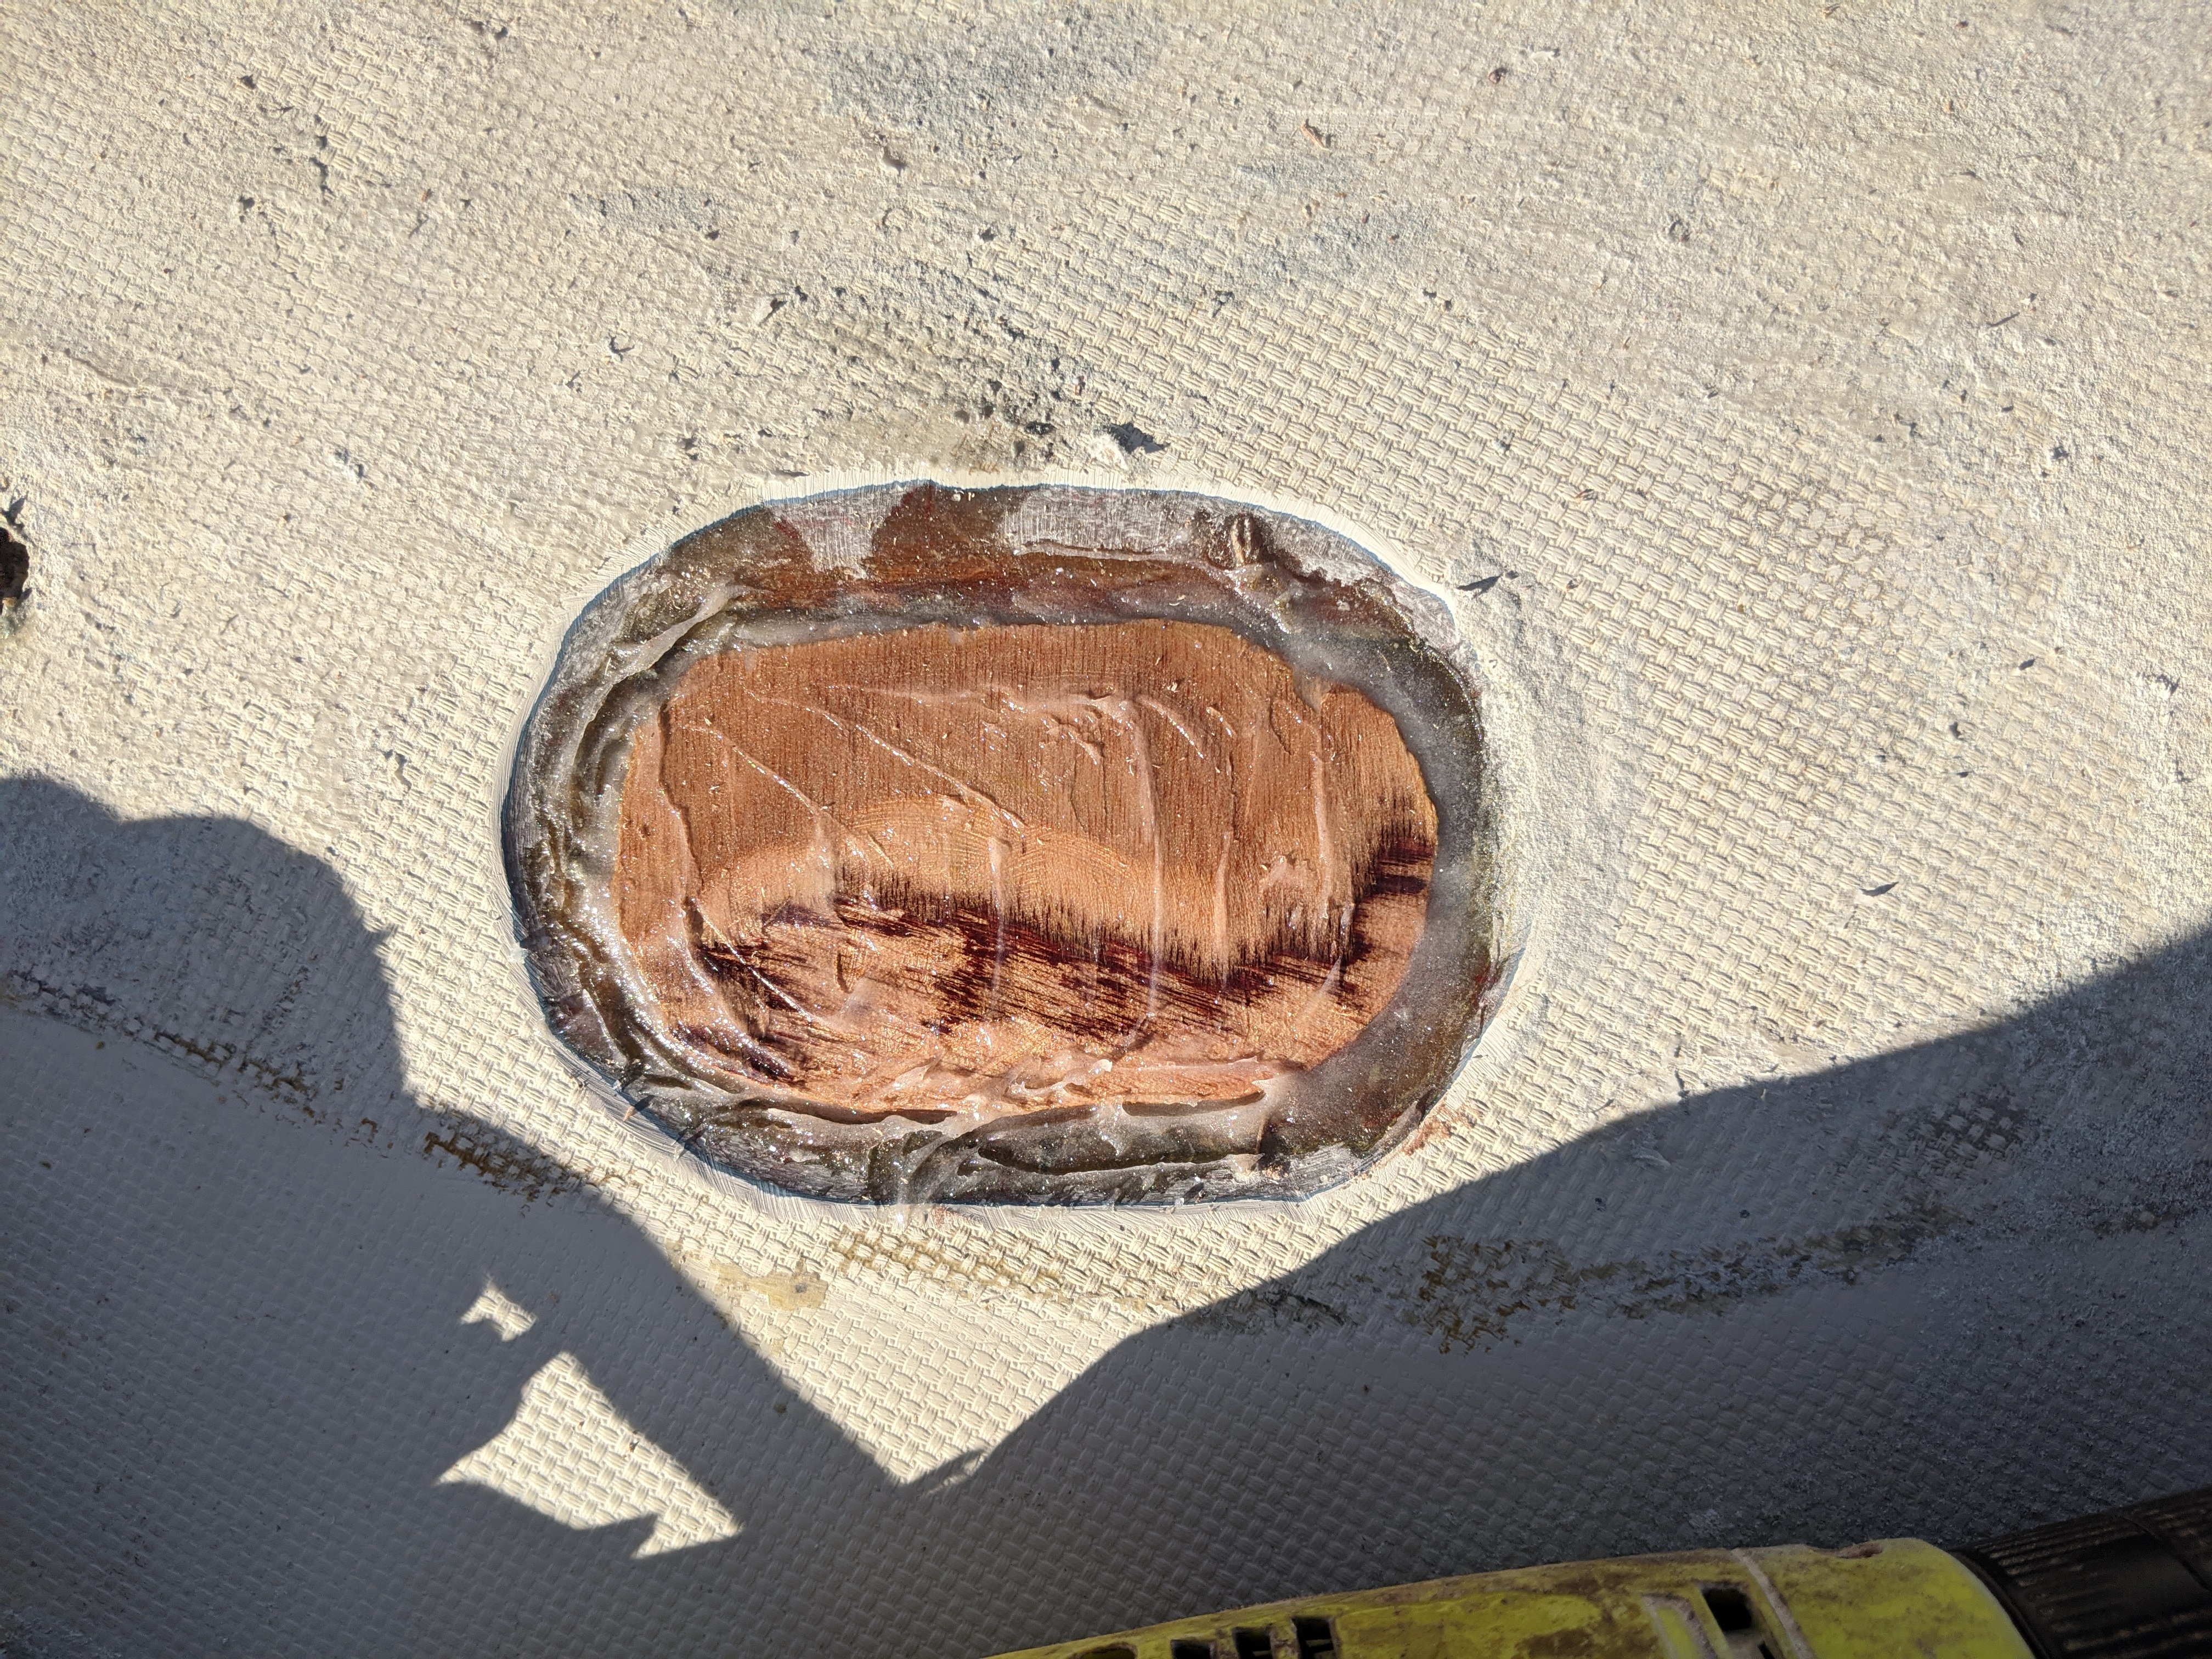
I started by cleaning out the old hold and tapering the fiberglass around both sides, prepping to lay a new core material and fiberglass cloth on both sides. I cut a piece of marine ply to match the hole then taped the bottom to prevent epoxy from falling through while I completed this first step. I used West Systems 406 to thicken my mixed epoxy and applied it around the hole, eventually squishing the new core material into place. 24 hours later this has cured into a nice central layer. I got up early the next morning to take advantage of the cold weather to start laying up my top fiberglass layer. Using my pre-cut pieces, I layered them on to fill the tapered cut I had previously made in the top layer of fiberglass. This was a sticky and messy process, but relatively simple. After this mess started to kick, I did the same with the layer that I applied under the deck, to the other side of the core material. Once I got everything into place, I left some plastic underneath to account for drips.


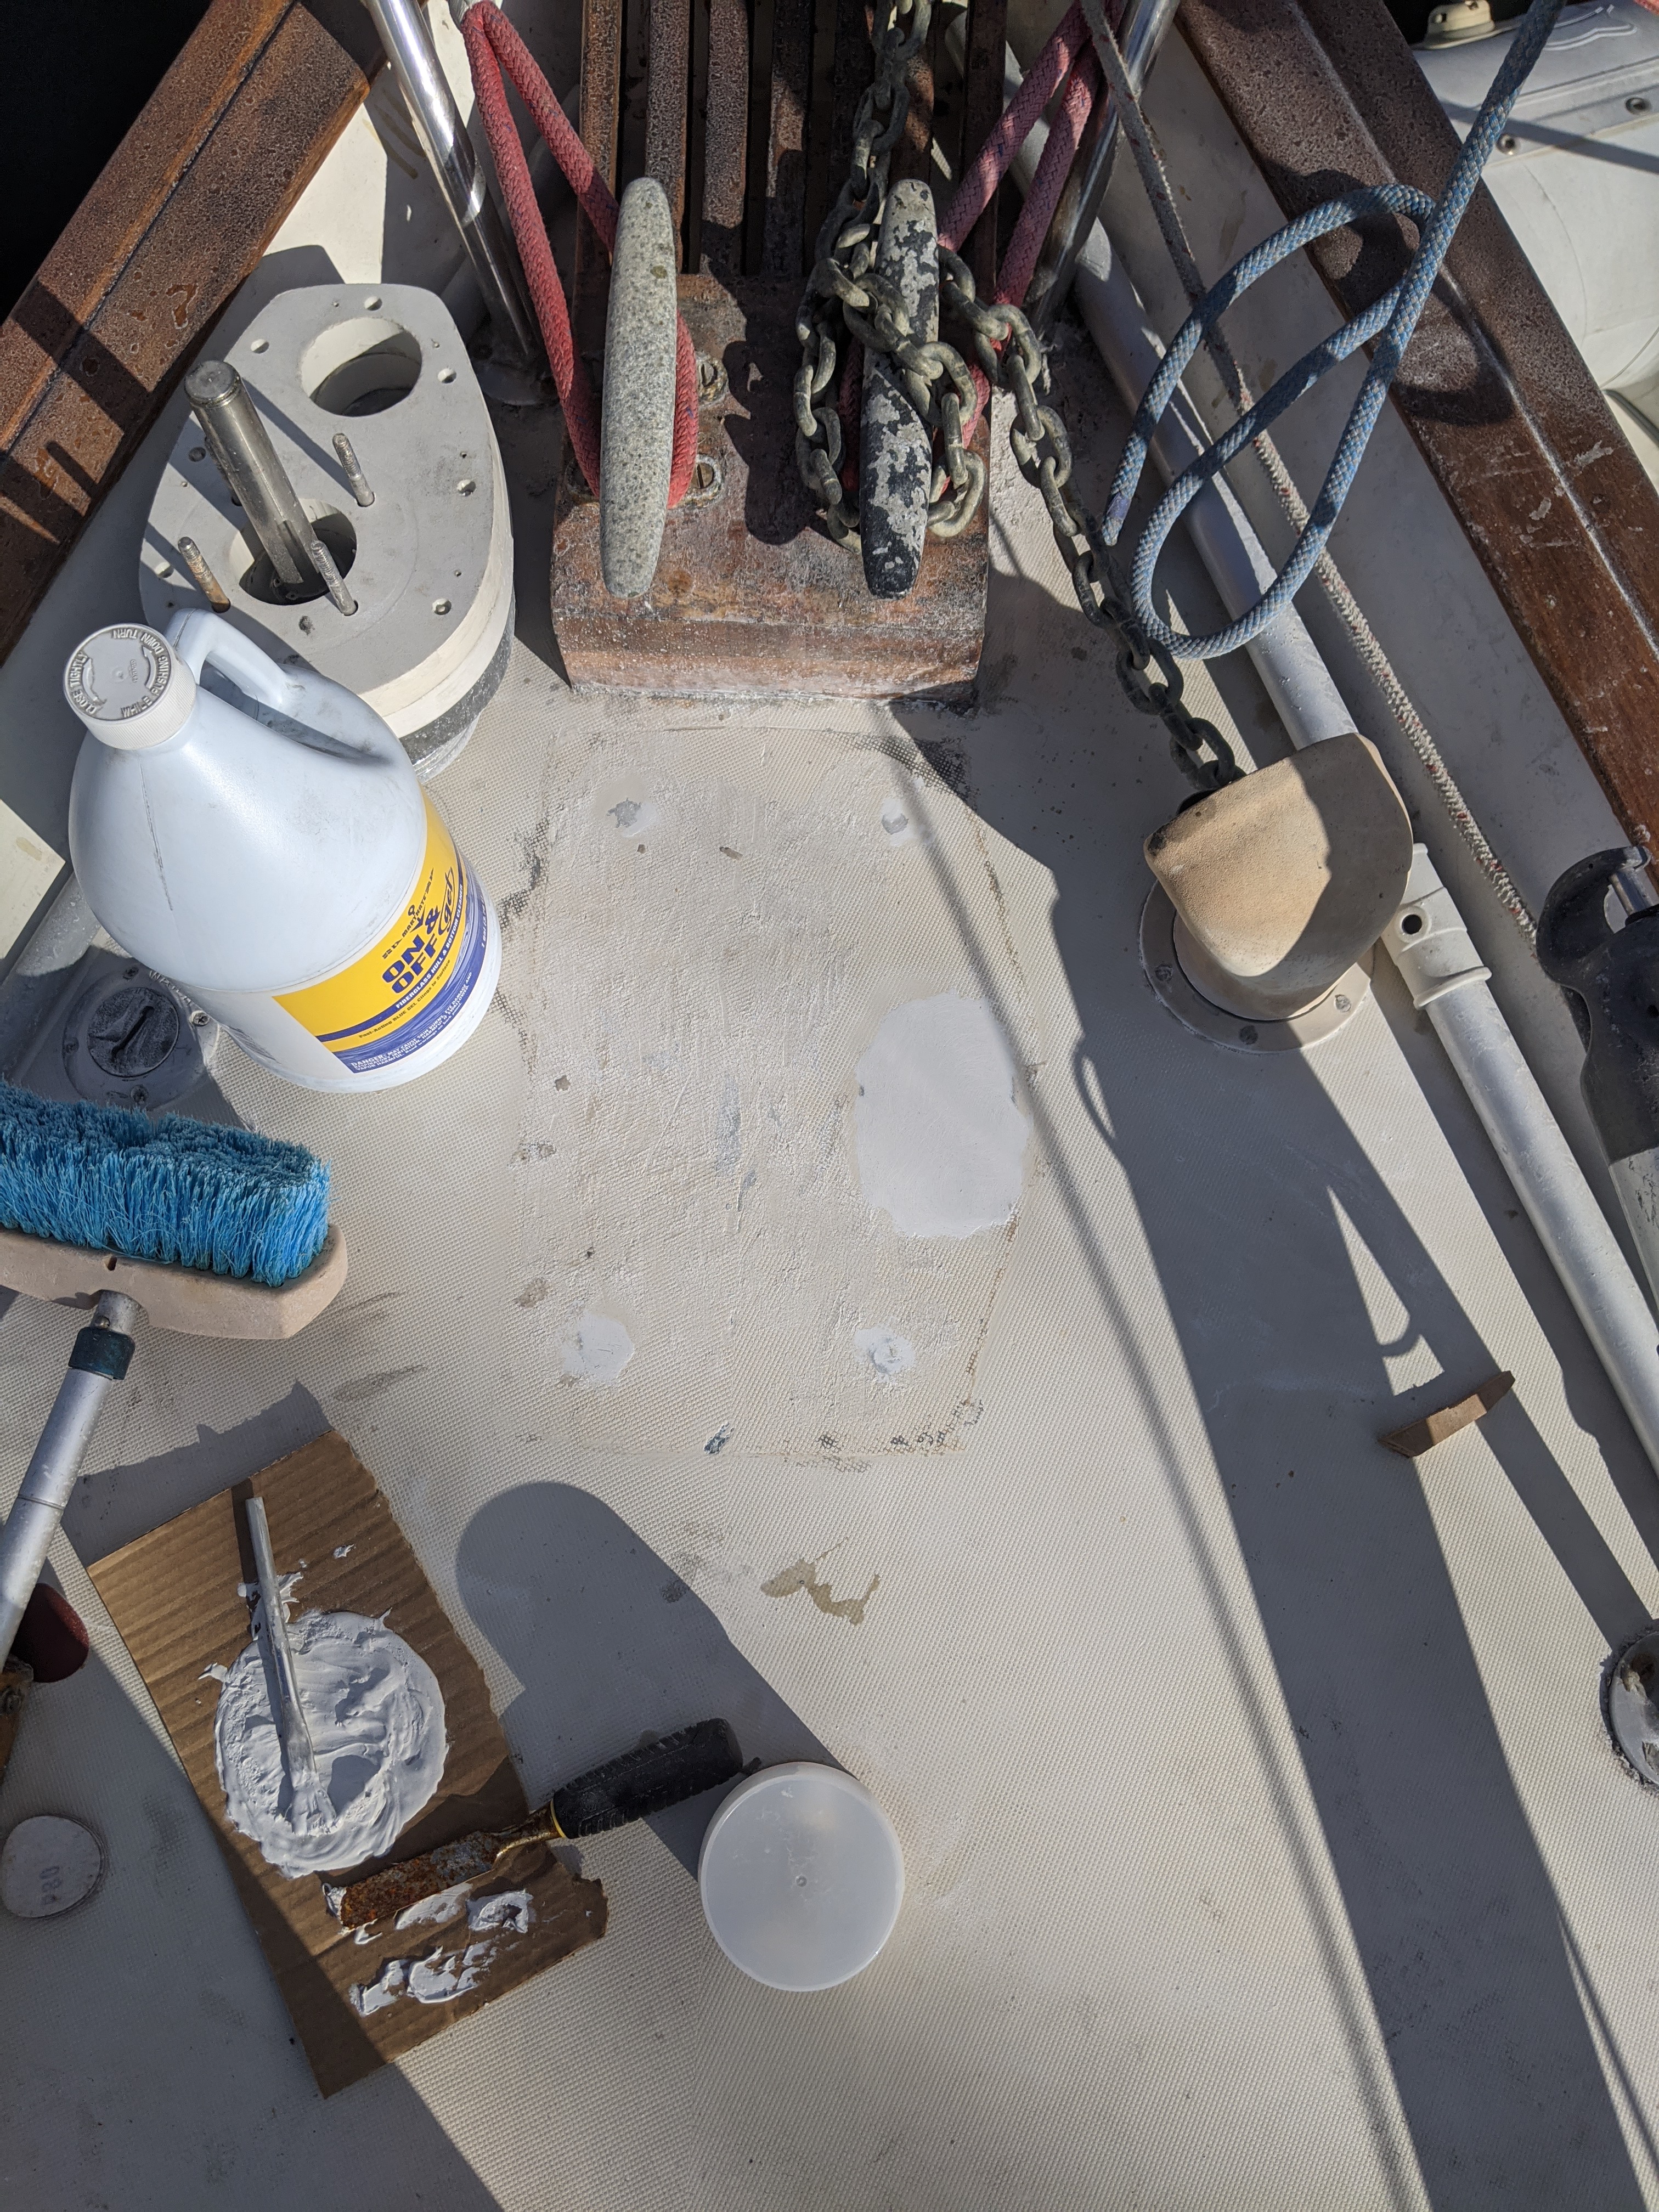
The following day I checked both sides and the curing process had gone as planned, hooray! I used a marine filler, applied to the top, to smooth and fill small crevices that were left from the previous step. It cured and hardened in about 30 minutes and I followed with an orbital sander to match its top to the curve of the deck.
Not. Too. Bad!
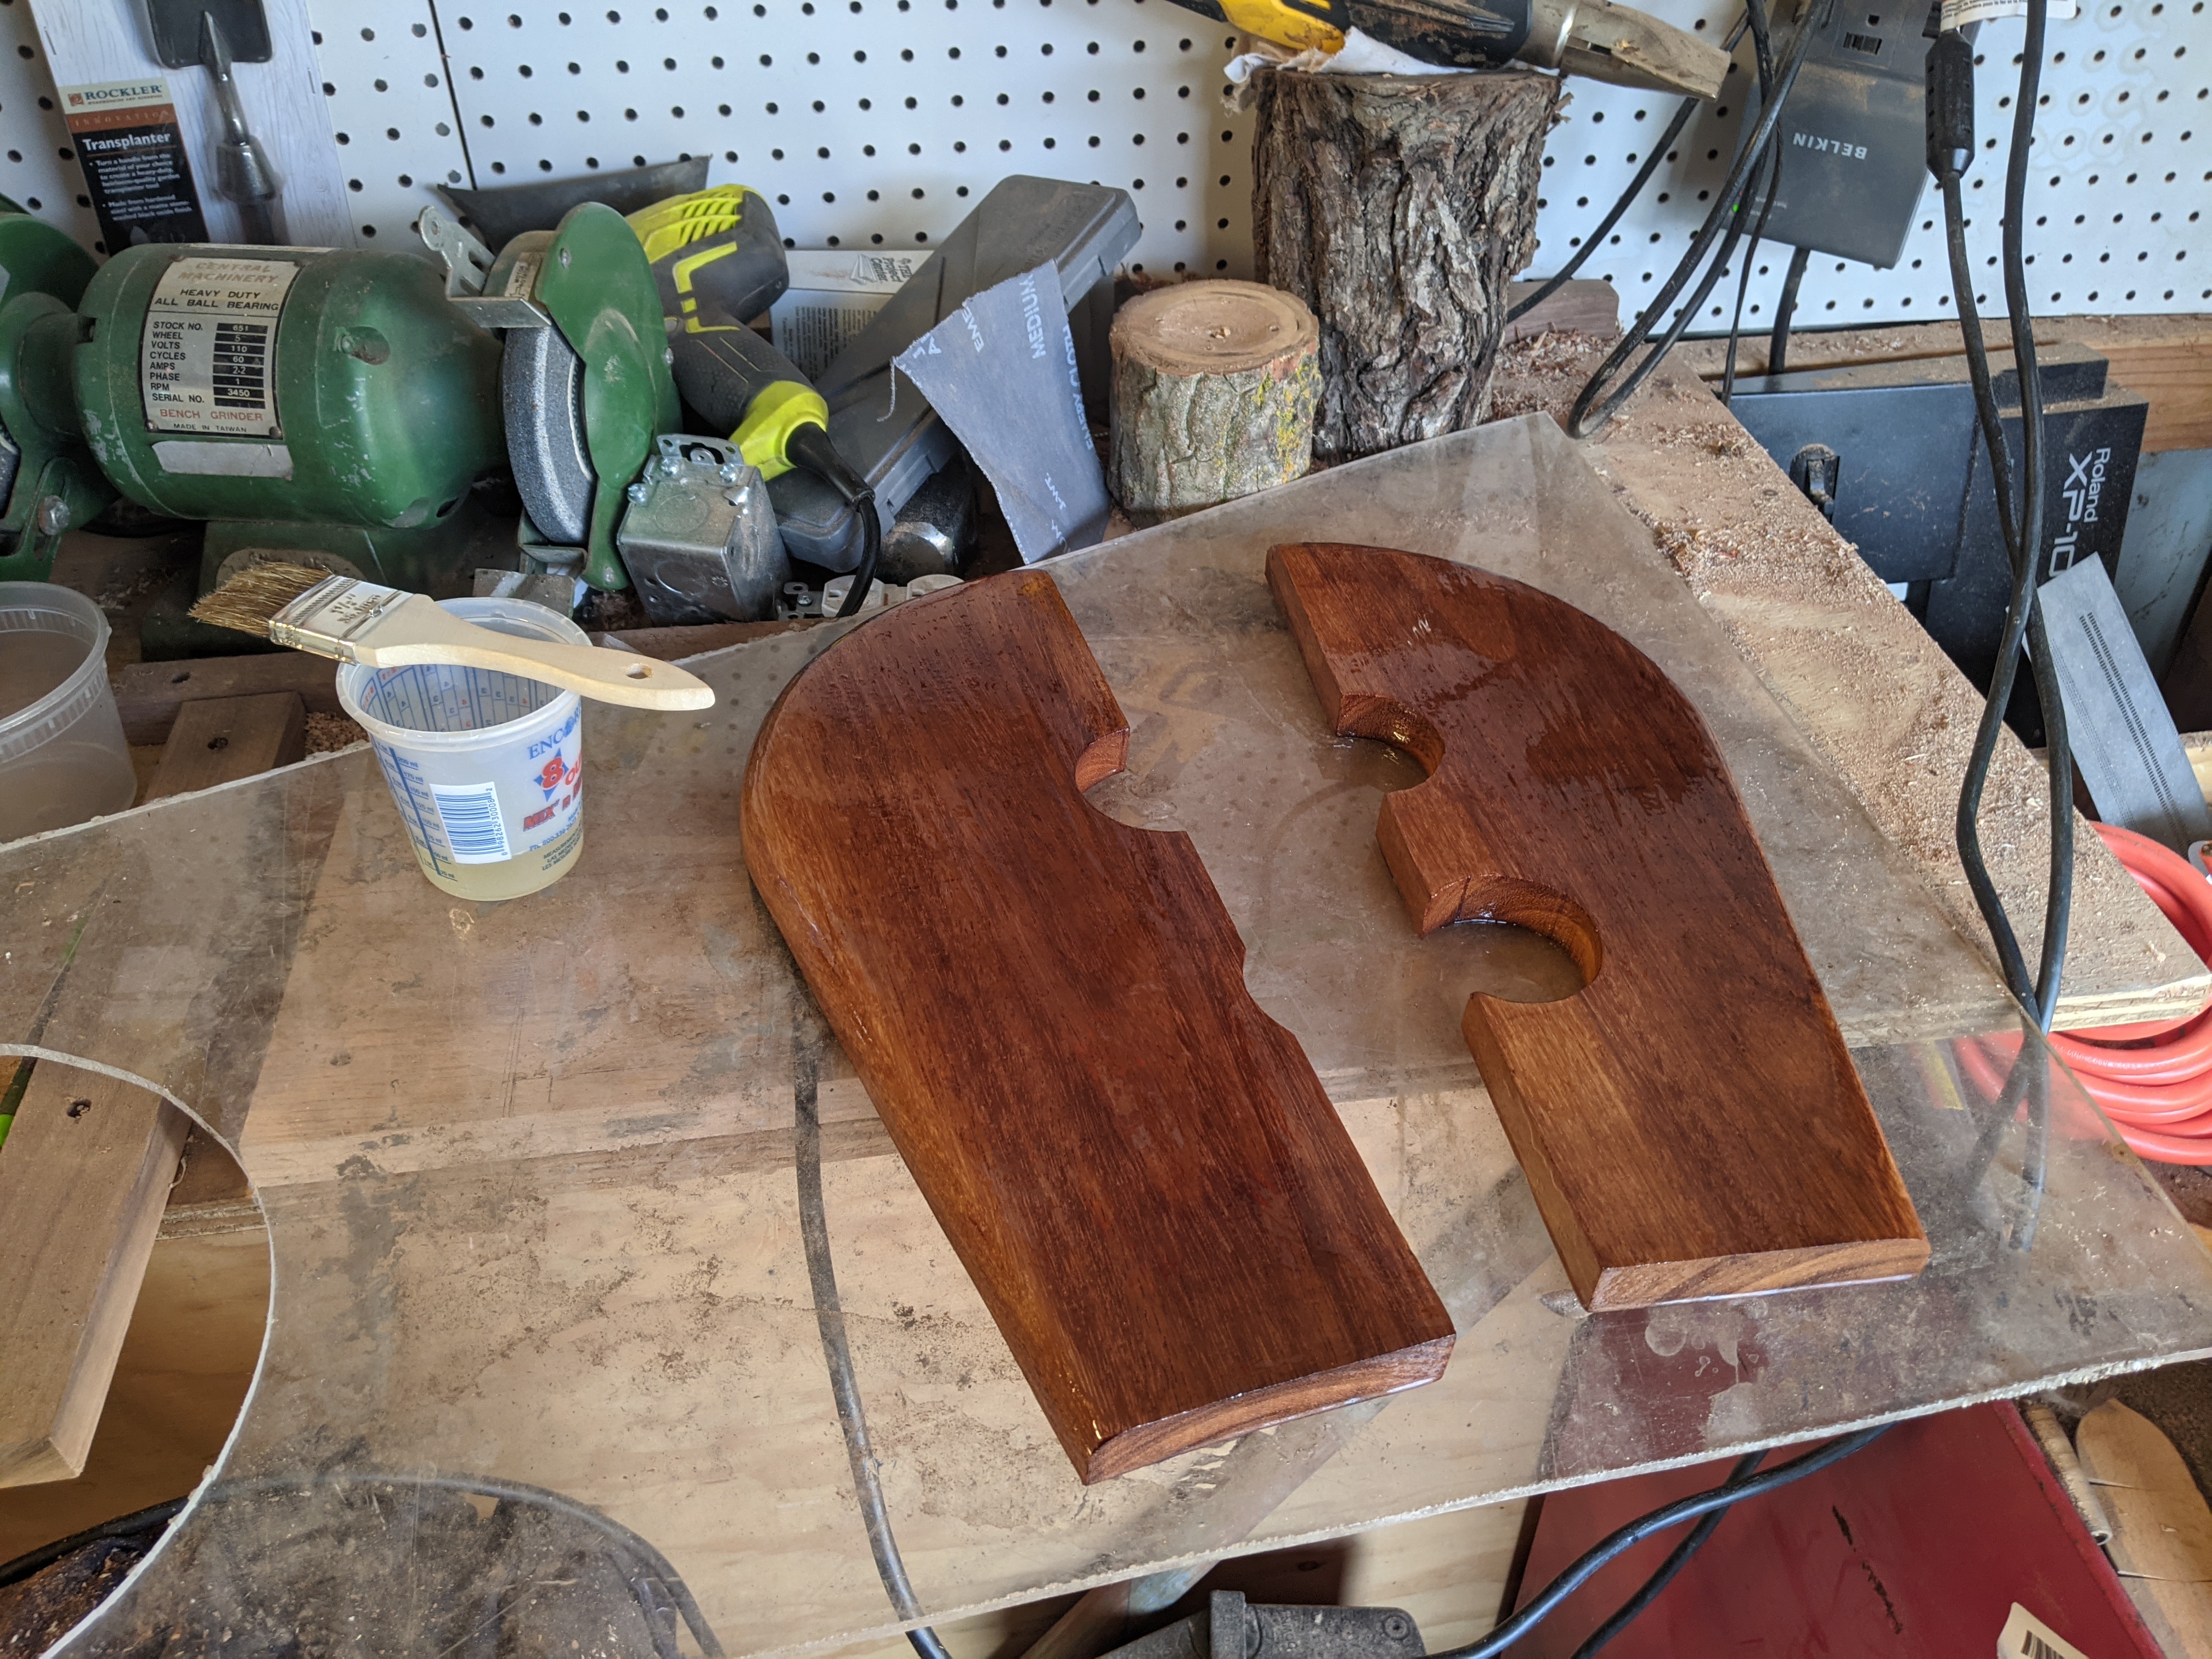
As this is an in-progress post, the next step is to build a platform for the new windlass that both covers the old holes, and acts as a sturdy riser to bring the new windlass to the right height to catch the chain from the anchor platform. Here’s a sneak peek pic and I will follow up with progress as I make it!